Wednesday, December 22, 2010

Teacher Gifts

Teacher gifts are always a struggle each year. I want to make sure I am giving gifts that show our level of appreciation and are meaningful at the same time. Two years ago I came up with what I thought was the perfect gift and had glorious visions of making them each year, leaving a physical track of my children's trek through the elementary school. Only to gave the vision squashed as I went to purchase the necessary supplies last fall. I do have plans to do a little research and make them for teacher appreciation in the spring, still leaving our mark! :)

Instead I tweaked an idea my mom shared with me last winter. So I made these cute gift card holding cards. I used the Christmas Cheer cartridge to cut the Santa and the list out. The rest is ribbon from Walmart and paper from one of my favorite places (the dollar bins at Target).
The inside of the card, had to of course rhyme. It is a little hard to read, so it says: "He's made his list and checked it twic, Your name topped the list as nice! Merry Christmas." Then I had each of my kids sign their respective teacher's cards. Then a gift card was tucked inside the ribbon.

I also included a little treat for the elementary teachers. Here's a little warning to all you teachers out there...your students notice your little treats! I asked my girls what their teacher's favorite treat was and they easily told me a 3 Musketeers bar - mint. When I asked the 5th grader he said, "Mrs. Smith doesn't really eat treats, but she LOVES Diet Coke. Like seriously, Mom. I mean she LOVES it. She drinks like four a day." To which the girls added that their teacher likes Diet Pepsi. So I filled gift bags with the appropriate soda and threw the tissue paper wrapped card on the top. Hopefully they know they are appreciated!

Saturday, December 4, 2010

Just a few to start with...

Here are a few of the centers that my students work on. All of them are completed on a daily basis, except the first one, but may differ slightly from day to day. It took some time in the beginning, teaching the routines and expectations. But it was well worth it. 'Count your Money' is completed once a week. Each of my students is assigned one of the days of the week to count the money in their bank. They then make the decision to cash it in for a prize or save for something bigger. Last year, I had all students counting on Friday and it felt like 20-25 minutes of pure chaos and impatience. So I wised up and have 2-3 students a day take their turn. Now it takes 5-10 minutes depending on the students' abilities. But it IS getting faster...and that is the whole point. The more I can put money in their hands, the more secure the skill will become. I did devise a cheat sheet for students to reference, helping them see what coins equal a quarter or dollar and so on. Some use it, others have graduated from it, and others simply never needed it. It's fun to see the progress.

The dollar was cut from Cuttin' Up. The stickers were given to me by another teacher in my building.
Punctuation Poetry is the combination of two different ideas I've learned over the course of my career. For students with reading fluency issues, it is often recommended they read poetry because the sing-song cadence lends itself to speed with repitition. I also took a training where one of the presentors taught some kinestetic movements to help students recognize the conventions of writing: capitalization, periods, commas, quotations marks, questions marks, and exclamation points. All the things my friends ignore in both their reading and writing.

I spent the first couple of weeks walking the students through the movements as I introduced the new poem for the week. As the students read the poem, they raise their arms straight above their heads in a point for capitals (most of them end up clapping), swing one arm in front of their bodies for commas, stamp out periods, and more. I developed another cheat sheet for this one. My girls were nice enough to be my models and act out the movements for me while I snapped photos. Each student referred to sheet in the beginning for help. Now they have the actions down.

This one is fun because there is no doubt when a student is completing it. You see and hear them at their desk reading, clapping, jumping, swinging, etc. It's great! I do have them come and show me the card before they start so I know to give them a little peek while I am working with other groups. I did have a few sneaky friends who tried to put their cards up on the board without doing the work. So I found a way to work around it, if you don't show me the card and I didn't see/hear it, it didn't happen. I don't have a problem with it anymore.

This center helps students learn to pause when the they see punctuation. A lot of my little friends blow through punctuation in oral reading which can change the meaning of the text. When they have to stop and complete the action before reading the next word it forces them to pause. This idea can be used during guided reading as well. Trust me, it breaks up what can become mundane. And who doesn't appreciate getting up out of their chair and moving a little? It can also be used when students edit their own work. If they only stamp out one sentence, they have to go back and find where the ending punctuation is missing. And those capitals that are often left out...it's like a little treasure hunt in their own writing.

The punctuation marks were all cut using Disney's Mickey Font.
Not a lot to say here. These are more drill and practice activities, worksheets that review and reinforce activities we have worked on during math. So many of my friends get it during math group, but when presented in a different fashion, or left to independent practice, forget or get confused. So this is an opportunity to see where the holes are and what needs to be revisited. My aide will work with students who are making mistakes so we are not constantly practicing the same mistakes over and over. We have worked our way from 2-digit addition with no regrouping to 3-digit addition with regrouping, 2-digit subtraction with regrouping, and rounding. Multiplication is on its way...and the kids are excited!
The math symbols were cut using the Cursive cartridge.
FastMath is a computer program by Scholastic my District utilizes to develop automaticity of basic math facts. Each student spends 10-15 minutes per day working on their basic facts.
The computer image was cut from the Cursive cartridge.

Wednesday, December 1, 2010

One of my Favorites...

Here is one of my favorite things I developed with the use of my Cricut. Over the summer I had to give some serious thought to how I was going to keep students actively engaged in learning while I worked with 3 grade levels. For the last 2 years I had only juggled 2 grade levels. I was going from having a large number of 5th graders who were somewhat independent, to a larger group of 3rd graders. This was a test to my creativity as I tried to come up with meaningful, independent work they could complete that would enhance concepts we were working on.

My mom is always kind enough to send ideas my way, so I used one as a springboard. Over the next few blogs I will attempt to illustrate what 'Centers' look like in my room.
I use my whiteboard for students to show what work they have completed. It is a fun way for me to quickly see who deserves a little free time and who needs to get to work.


Each student has a 'name tag' that stays on the board. I used different images from the Life is a Beach cartridge. I assigned an animal or beach item to each student. This same image is found on their take home folder as well. At their desks, stored in a quart sized ziploc baggy, are 10-4x4 inch cards, one illustrating each center. When the students have completed an individual center, they place the corresponding card on the board. At the end of the day, students 'cash' in their center cards. Each center is worth a nickel and students have to complete a minimum of 5 in order to be paid. The students count the cards in front of me or my aide. Then they have to show us the easiest way to make that amount of money using the fewest coins. Students are working on skills such as counting by 5s, multiplying, money name and value identification, and counting money -- all those skills that need constant repetition in order to be retained.
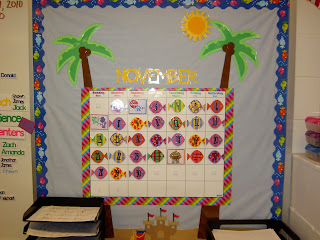
Each student has a designated to day to count all the money earned in his or her bank. That is the same day assigned for cashing in for prizes. More on that later.
A few suggestions I would make regarding things I learned:
  1. If I were to remake them, I would make them smaller. Probably 3x3.
  2. The adhesive on the magnet strips I bought at Wal-Mart stick better to lamination than those I bought from Menards. (Thought I was saving money -- it's worth it to spend a few extra pennies)
  3. About 2 months into school, I had to devise a way to identify each individual student's set of cards, making it easier to find and identify MIA cards. I put a matching sticker on the back of each card that is specific to an individual student. If I were to do it all over, I would place them on before laminating.

The nice thing about this, I can add centers or change them as I deem necessary. After the first of the year, I will be adding a handwriting center. Printing for some of my friends and cursive for others. The kids are eager to start the cursive.

Tuesday, November 30, 2010

Somewhere in the Sun...

It is every teacher's job to transform 4 white walls into an environment in which students can spend a minimum of 6.5 hours per day. Bright colors, word walls, math facts, vocabulary, bulletin boards, calendars, etc. Whatever it takes to stimulate young minds. Over the course of my employment, I have worked in 4 different schools. Only one school provided me a room with a window. The others have 'boxed' me. On any given day I couldn't tell you whether the sun was shining, rain or snow fell, or if the cool wind blew. Truthfully, I don't notice it on most days until I walk out of the building and think "uh, it snowed" or "wow, what a beautiful day." But there are those days when I long for a look into the outside world. Since I know a sky-light is out of the question, I had to find a way to invite the outside world into my room. So I decided to go with a beach theme. Bring the sunshine inside...even if it is made of cardstock and lamination. ;)
It started with the welcome sign I posted earlier. Then I decided to make my own calendar. It was far more work than I anticipated, but I do have to say I have the cutest calendar in the building.
I used the Life is a Beach cartridge to cut all of the pieces except for the sun and the palm tree trunks. The tree trunks were done by hand and the sun was cut using Going Places. The fish I used for the dates were altered using Design Studio. The actual fish are longer, thinner fish. I needed to fatten them up some to fill up the calendar squares. I couldn't resist, I had to bring them to life with googley eyes. The months of the year were cut from the Life is a Beach font and 'welded' together using Design Studio. The numbers, holidays, and special occasion cards were cut using Designer's Calendar. I thought I could quickly cut each of those out in 2 hours time. 4 hours later I was still cutting and pasting...but it turned out cuter than I anticipated.
I am including both November and December so you can see some of the different elements.

I did laminate all of the pieces and put velcro on the back to make for easy changes from month to month. I do wish I had laminated the calendar poster board before putting the velcro on it. It is not quite as sturdy as I would like. But works none the less.
I bought the fish border and calendar posterboard at my local teacher supply store. I used material for the background (less fading) and sandpaper for the bottom border.

Monday, November 29, 2010

It's all about the Schedule...

This blog pays tribute to the working mom...who not only works a full day outside the home managing any number of tasks but returns home to more demands. I have been home less than 3 hours and in that time have: helped 2 second graders with math homework, cleaned out their folders, and listened to them each read, changed the linens on my bed, picked up my 7th grader from basketball practice, made and served a homemade meal, put the lights and ribbon garland on my Christmas tree, supervised chores, and am now on my 4th load of laundry. I am exhausted to say the least. But bed time for the kids is at least an hour away. In that time we will decorate the tree, welcome Dad home from a long day's work, brush teeth, say prayers, and listen to at least 20 different attempts to avoid actually getting in bed. All in a day's work right? The great thing is, I will do it all again tomorrow, varying slightly. Somehow amongst all the chaos there is happiness, laughter, and love!!

It's interesting how my work life often mirrors my home life. I am constantly running in about 3 different directions at any given time, attempting to be everything to everyone, and managing to get things done in the midst of it all. One thing that helps me in my classroom is my picture schedule. This is something I developed last year.

My classroom is a self-contained special education room for 3rd-5th grade students with mild/moderate disabilities, ranging from learning disabilities to autism to mild cognitive impairments. I am responsible for delivering each grade level's core instruction to each student. We are very busy and every minute is scheduled to the fullest.

To help my students anticipate and prepare for what our day will look like I made the schedule below. It helps them see everything from subject matter to their special classes (art, health, PE, and music) to the related services they receive.

I used the Learning Curve cartridge to cut all lettering. I 'welded' all words together using the Design Studio software. It is all cut and attached to cardstock, laminated, and magnetized. (I purchased magnet strips at Walmart and my local hardware store.) I made 3 name magnets per student, as well as magnets with various times on them.

The math symbols were all cut from the Learning Curve cartridge. The open book was cut using the Cursive Cartridge and the pencil was cut from My Community.

Both the globe and the beaker were cut using the Curisve cartridge.


The earphones were cut from the My Community cartridge. I used the Cursive cartridge to cut the computer and the pencil is from Locker Talk.

At the time I made my schedule, I didn't have access to all of the cartridges I do now, so I used some clipart. All clipart is courtesy of Microsoft.

I used My Community to cut the police officer. The fire truck was cut using the Everyday Paper Doll cartridge. "Drill" is one I added this year because we have either a fire, tornado, lockdown, or evacuation drill once a month. Since my little friends need warning to ease their anxiety over the drills, it serves as a reminder for me to talk to them about the upcoming drill and helps them know where it will fit into our day.


All of the extras: the bookstack, clef (music - I hope that's right??!!), and brushes were cut using the Cursive cartridge.
The clipart is again curtesy of Microsoft. All the balls were cut using Sports Mania.
Locker Talk was used to cut the grade level signs. I cut these because I teach math 3 times a day and lunches vary. This way the students know by the color and wording what applies to them. I mentioned before that everything is color coded. That goes for subjects and grade levels. 3rd grade is green, 4th grade red, and 5th grade is blue.
I am planning, but haven't yet gotten to, making picture day and assembly pieces. They will come...one day.
I also had a "one of these things is not like the others" moment when I was looking at the first picture. After the birthday cupcake wall I mentioned, my next project may be magnetized dates to coordinate with the picture schedule...more to come on that one.

Thursday, November 25, 2010

Welcome to my Classroom...

Upon entering my classroom, this is what you see:
The shape of my classroom is unique to any other I've seen. You enter into a long, approximately 10 foot narrow hallway, before it opens up into the big cinderblock box. This hangs in the long hallway where the kids line up whenever we leave the classroom.
Most images and the title were cut using the Life is a Beach cartridge. School items were cut with either Cursive or Locker Talk. Looking at the picture now, I'm going to to have to do some sort of an addendum to highlight some of the items. I tried to choose items to illustrate each of the core subjects: reading (the crab with the book), writing (the notebook paper and pencil floating in the waves), math (the whiteboard with multiplication problems in the waves), science (beaker in the waves), and social studies (the globe in the waves). The whiteboard contains 3 of the multiplication problems that are difficult for students to remember (like 6x7=42, 7x8=56). My hope is that as my little friends line up day after day seeing those problems, they will eventually be committed to memory. I did draw and cut the the palm tree trunk on my own. I didn't like the skinny trunk the cartridge provided, so I improvised. For the sand I used sandpaper. One word of caution - it is not easy to glue paper on to sandpaper. I used superglue which took longer than the norm to dry because sandpaper is not absorbant and seeps through the detail lines of your image. All I can say is be patient!! I was out of glue dots in my tape runner...that may be a better choice.
After the holiday, I will take a few more pictures to highlight some of the details!!
Happy Turkey Day!!

Wednesday, November 24, 2010

What is a Cricut?

A Cricut is an electronic, personal die-cutting system. It requires the use of cartridges to program images, shapes, or fonts for cutting. The technology allows for you to cut layers and images for everything to cards, scrapbooks, bulletinboards, and more. You simply plug your cartridge in as shown below or you can purchase the Cricut Design Studio. The computer software allows you to manipulate the images in size and shape. It allows you 'weld' your letters together so you are not always cutting out individual letters. This is a great time saver not only when it comes to peeling off the letters, but also when glueing them down to your project.

I know this is starting to sound a little like an info-mercial, but I just want to share the tools I have to make the projects possible. This is the Cricut Expression - it cuts up to 12x12 and 12x24 inch projects
I also have the original machine that cuts 6x12. I convinced my cute
husband I needed to upgrade because it would 'cut' the time I spent on
my projects down considerably. I have to admit there are times when I have had
both machines plugged in and cutting. (Trust me, it's gotten me an eye roll or two)
With the help of little fingers (my adorable twin daughters)
helping me peel the images off the mats, I have been able to get some of my work done
in much less time. And it's a bonding experience - the girls still love to help
Mom at this point in time. I love it!!

Just a few of the cartridges I have used on some of my projects.
You do have to buy them individually. I always watch
for sales. They have some great ones...but I have found the best deals on e-bay.
I would by no means consider myself an expert on e-bay, but I do
have my system and refuse to pay over a certain price. I also
have a great source who doesn't mind sharing her cartridges.
Once again...thanks Mom!! :)
Here is the Cricut in action, cutting my latest project.
It's time to get rid of the boring birthday poster and make it a
little more festive in my room with a birthday cupcake wall.
I will be posting it later, when it's completed. It is an idea I 'borrowed' from
When it comes time to post, I will be sure to give credit the inspiration. :)

I promise the next post will actually include a project...it's time to get this baby off the ground! :)


Sunday, November 21, 2010

Why Did I Finally Join the Blogging World?

After many years of taunting from my friends (you know who you are), I have FINALLY decided to join the world of blogging. Not to necessarily share all of my inner most thoughts or post the beautiful faces of my loved ones, but to share what I couldn't find this summer when I searched the internet for ideas.

***Disclaimer: I am by no means internet savvy, so the fault is my own. I have definite ideas of what I am looking for and want immediate results. I am not patient enough to search past page 3 or 4 when doing a Google search. So if you have done something similar to what I am trying to achieve, I apologize profusely for not being able to find your fabulous site and would love a link!! :)

Rather than trying to keep my family and friends up to date on the events of my family's lives I am starting this blog to share the ideas I have developed or borrowed and tweaked in my classroom.

As a teacher I like things highly organized (those who visit my house, might claim otherwise). I am a self admitted control freak. Everything is color coded and has a place. Office supplies make me giddy. Paper clips, folders, markers, glue pens, paper, and markers...bring them on!!

I have used my Cricut here and there to make a few items to use in my classroom. But it was this summer that I truly caught the 'Cricut bug' so to speak. Though I put in A LOT of long hours to make it a go...I can see the benefits and even time saved once implemented in the classroom. And my students love it!! Which is truly what it is all about.

So I hope through this blog to share some of my ideas and would love to if you shared yours as well!!

Saturday, November 20, 2010

What's in a Name?

Where did the name of my blog originate? My very clever husband. You see he does not quite appreciate how a teacher's work is never done. When I walk out the door at 3:45...or 5:00pm it is with a heavy backpack and a list of things to complete before I start the next day.

Over the summer I spent some time researching and putting together what I thought would make life much easier for a full time teacher and mother. What did that entail? Hours upon hours of cutting paper on my cricut while monopolizing not only the computer, but the entire loft. But I have to say the mess (which I should have documented) and all the long hours paid off. Not only is my cinderblock room..I mean my classroom...very cute, but it is much more efficiently run. I owe it all to my cricut, a few ideas I found online and tweaked to make my own, my mom for sharing her cartridges, and my patient family who put up with the mess, late dinners, and general chaos.

So my cute husband came up with the name...because that's all he saw me do...'stick it in my cricut' all summer long.