
In an attempt to share my projects with others, I'm making this a public blog. Updates on the family and other happenings continue to be private. If you'd like an invite please leave a comment with your email address. It will be emailed to me so others won't see it. I'll add you to the private blog. Thanks for stopping by!
Sunday, November 27, 2011
Friday, November 25, 2011
Wednesday, July 6, 2011
Menu Cards...
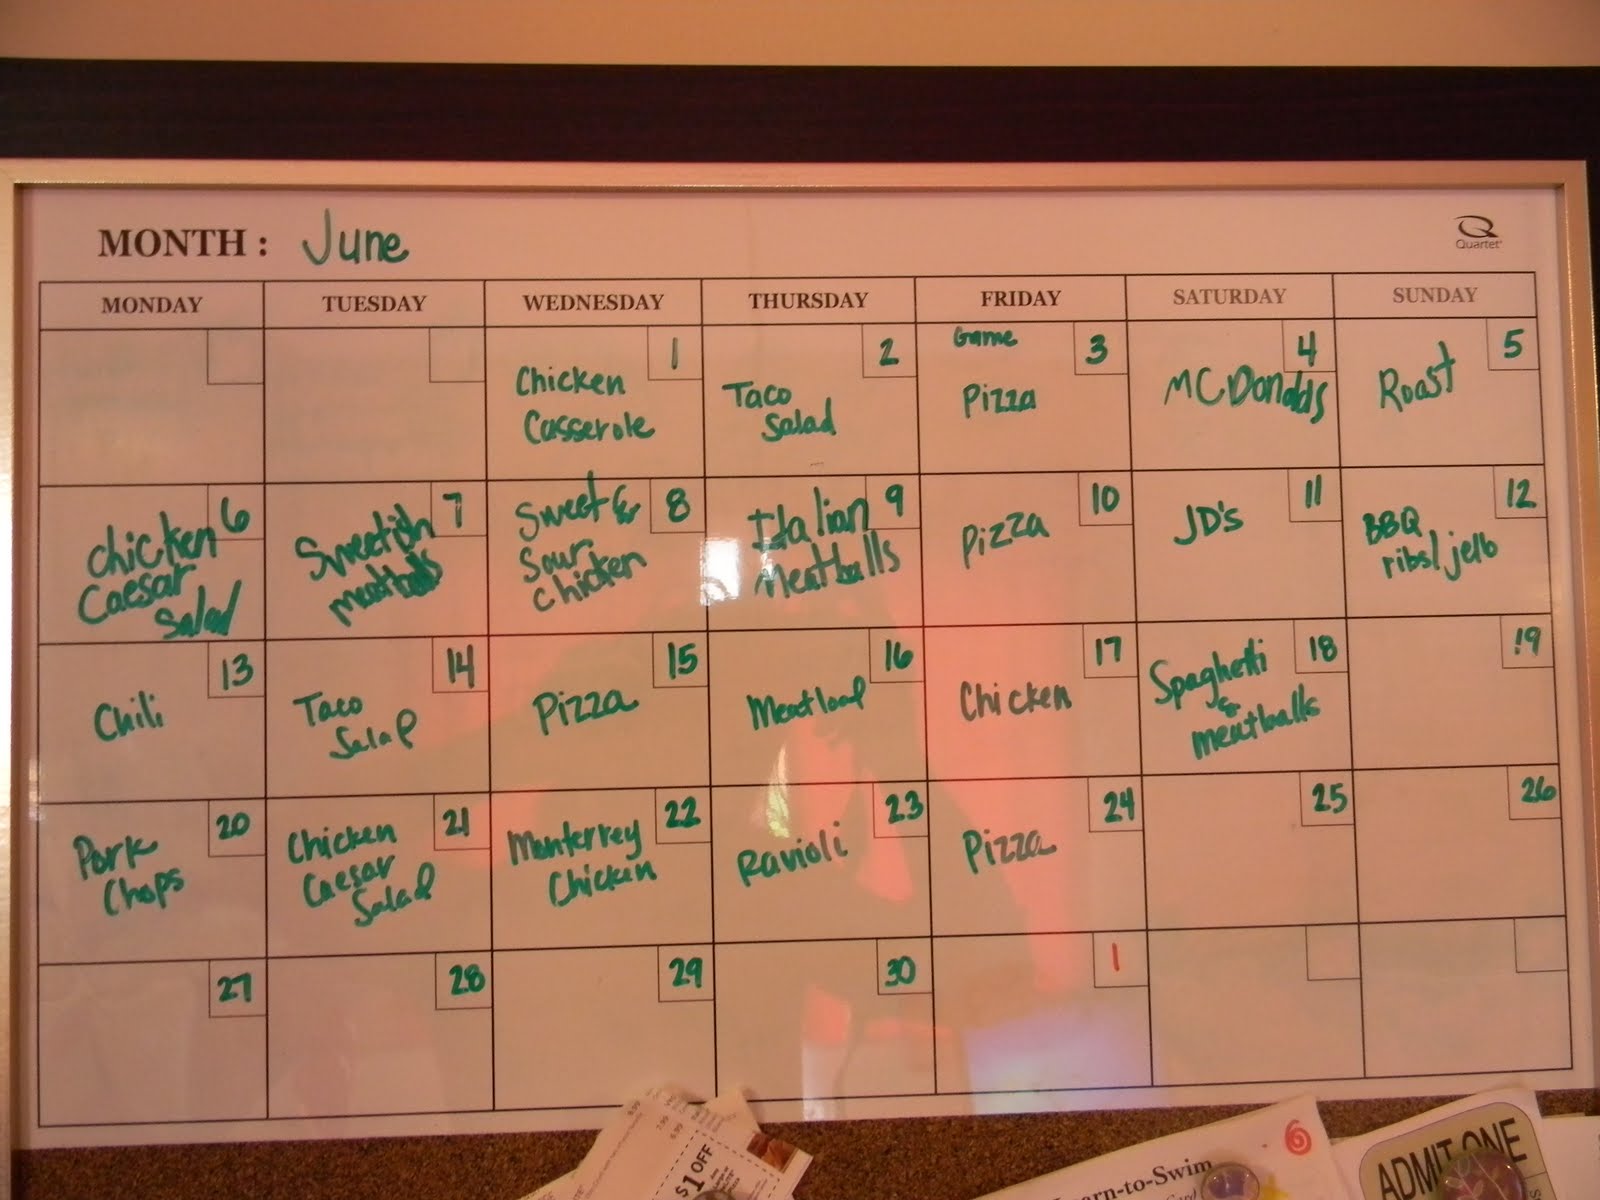
For years I have made out a weekly calendar of meals, noting ingredients to add to my weekly shopping list. I know it has saved me money and trips to the store each week. Over the years, I have used computer generated calendars, but most recently this:
 It's worked for us. My only two complaints would be: 1-the dry erase markers do not fully erase leaving colored smears on the board and 2-coming up with ideas for the meals.
This spring I found something that would take care of both of these issues. But I knew I would need time over the summer to make it happen. So I sat down 2 weeks ago and typed these up. The next day I printed, laminated, cut, and placed magnets on the back of all 46 of them, including two blanks, for meals out and new recipes. Now all I have to do is sort through the cards and place them on the board. Less thinking, easy planning, and cute to boot!
Here they are:


 The great thing is, I can easily make more cards as new favorites come along because they were generated through a PDF file. I was going to provide the link, but as of now, I can't access the site. But in order to give credit where credit is due, I was able to download them from:
www.blog.myheartandhome.com
One of the fabulously talented ladies who contributes to this blog, generated these adorable cards you can type right on. Warning: when you open them, a large white text box appears, the box does NOT print.
I plan to check back to be able to provide the link, otherwise leave a comment with your email address and I would be happy to share!
The one problem I have encountered with these is the flack I take if I don't serve everything indicated on the card. No need to fear I am already 'Cricutting' a disclaimer regarding how all meals are subject to change at the discretion of the cook.
Monday, May 30, 2011
Weekend Crafting...
This weekend we were confined by rain and void of baseball. The cute hubby and I continuously remarked, "It's only such and such time? Wow!" Though we both appreciated the change of pace and the ability to browse rather than fly through a store, I felt a little awkward. I can't remember the last time I didn't have an hundred things (that might be a slight exaggeration) weighting down on me. So I found a little something to keep me busy and continue with the theme of enjoying a little down time...CRAFTING!!
To the cute hubby it has the appearance of one more thing I have to do. He doesn't have a full understanding of how therapeutic it can be. Plus there is always the added bonus of admiring the finished product.
I had been feeling a little guilty because I've been so caught up in life I didn't take the time to shower my kids' teachers with appreciation as I've done in the past. So it was time to redeem myself. This project is one of my favorites, so much so, I couldn't resist the temptation to make one for myself this go around.
Two Christmases ago I made these for my kids' teachers and decided I would make it a yearly tradition. I thought it would be fun to show my kids' trail through the elementary school. Unfortunately, last year when I set out to purchase the needed slates I couldn't find them. Well, the wonderful world of the great wide web came through for me and I was finally able to secure a few (or 10...you know, just in case).
Here goes:
 Gather the desired number of slates and flowers, as well as corresponding ribbon and paint. You will also need some tacky glue (I use Aileen's), a drill, polyurethane finish, paint brushes, sandpaper, vinyl, and of course something to cut that vinyl with, like a Cricut.
 Here is an example I will use to show the project from start to finish.
 Tape the inside edge of the slate and sand the outside edges.
 Paint the slate's frame. Some colors need only 2 coats, others, like the pink, need 3. I also paint a quick coat on the back to finish it.
 Then it's time to protect the paint and ensure it doesn't rub off on other things. Apply a quick coat of polyurethane. I prefer to use Cermacoat's varnish. However I was committed to using only what I had in the house this go round. This works in a pinch, but takes longer to dry. And the cute hubby might just take your brush in the midst to do a quick touch up here and there around the house. :)
 The next step is to mark the holes for the cute hubby to drill. Two years ago I did the drilling myself, this year I let the hubby do the honors with is new birthday toy. I find the top, center of the frame and mark it with a pencil for the flower. I also place marks 1 1/2 inches from either end to tie in the ribbon used for hanging the slate. The drill bits vary depending on the flower, but I use a small one for the ribbon (I wish I had made note of the size, sorry).
 Measure 21 inches of ribbon. Slide one end through one of the side holes. Tie it off in back with a double knot. Slide the other end through the other side hole. Tie it off with a double knot.
 Measure and cut two 6 inch strips. These will be glued onto the top of the frame beginning about one inch from the center hole. Glue it over the top of the other ribbon (used to hang the slate) to the end of the frame. Once it has dried, flip it over, put a drop of glue on the side and glue the remainder of the strip down on the backside. I like to glue down the excess from the knot and then glue the strips that have wrapped around from the front over the top of the excess. I use wire cutters to cut the stem off my flower so there is about a third of an inch left of the stem. I dip what's left of the stem in the glue bottle and then place it in the large, center hole.
 Now it's time for the vinyl. Type in the desired name into the Design Studio software. This makes it easier to manipulate the lettering and spacing. Plus you can intermix fonts if necessary. For this go round I used 'Making the Grade' for all the lettering and "All Mixed Up" for the apostrophe and asterik placed to abbreviate Mrs.
 Cut the vinyl using the software and Cricut.
 Peel off the excess vinyl, leaving the desired printing on the backing.
 Apply the transfer tape. Burnish with a popsicle stick, brayer, or credit card to be sure the vinyl sticks to the tape and will come off the backing when the tape is pulled up.
 Position the transfer tape onto the slate as desired. Burnish in order to transfer the lettering to the slate. Viola, the finished project!
 Here are a few more, including 2 void of vinyl. Sometimes I get a little carried away when I find the time to play. I'm sure I'll find a use for them. I'm thinking they might make cute birthday gifts for ALL the birthday parties the girls get invited to! Check 'em out!
 The frame of this one is actually blue, but didn't photograph well. Also, I go back and forth on whether the flower is too large. I think I've looked it so long I've come to terms with it.


Saturday, March 26, 2011
Shannon's Words - Mormon Messages
This is a video my cousin Seth made about his older sister, Shannon. He entered it in a contest sponsored by the LDS church. Seth was just informed that his sister's story was made a finalist. To read more click here. He provides you with a link to go onto the contest site and vote for her amazing story.
Or you can click here and then click on the "Professional" link. Scroll down to "Shannon's Words" and vote for her truly inspiring story.
Monday, February 21, 2011
I have digressed....Back on Track!!
Since the holidays, I have digressed from my original intent of sharing how I've used my Cricut in the classroom (and other places as well). I am by no means a fanatic, but I have found it to be a very useful tool.
Last week when I posted about Curly and the monster fort (click here) and was looking at the pictures of the girls' room, I remembered I had used the Cricut to help stencil the walls. The house we moved into nearly 3 years ago was 2 years old and still had contractor's paint on the majority of the walls. We systematically went through the house and painted.
The girls room was a tough one. Their last room had been pink (Boo's favorite color). So Curly wanted her turn and wanted the room purple. I searched high and low for the better part of 6 months for affordable, cute purple bedding, only to come up empty handed. I can't take credit for the bedding we finally went with, my cute husband found it one day in Target. Though the quilts and shams do not have any purple, the matching sheets do! So it was a compromise Curly was willing to make as long as purple was somehow incorporated on the walls as well. The hubby had a stipulation as well, whatever wall the girls bed was on could NOT be pink. We learned from their last room that little feet and handprints show up well on the pink and washing walls on a weekly basis was not something we wanted to do again.
So with that, and this as my inspiration, I came up with a plan.
 To appease the husband, the wall with the bunk beds was painted chocolate. And to appease Curly, a variety of randomly placed polka dots were added for color (and to get the purple in). I cut about 5-6 circles using the George and Basic Shapes cartridge and went to town with my little Benjamin Moore Paint samples and a round sponge brush.
 The remaining walls were painted pink. But they needed a little something too, to tie it all together.
 So I added these cute flowers in 3 different colors (one of course being purple). I tried to match the flower from the bedding as close as I could. In order to do so I actually used the asterisk, setting the Cricut on 'shadow' mode, from the All Mixed Up cartridge. Then I cut smaller circles for the flower middles and I hand cut the leaf shape. Again with my little sample paint jars and sponge brushes, I went to town.
 Though the walls were painted over a 2 day period, the stenciling took much longer. I am a bit of a detail freak and went back over each flower, the centers, and the leaves, and hand painted the stitching with a liner brush. That took another week's worth of time. But it turned out adorable!
 My mom was kind enough to make this adorable valance using the top sheet from the bedding, some brown fabric, and pink ribbon. It is the perfect finishing piece. Well that and the vinyl saying I am going to one day add to the wall their dresser is on. I'm just waiting for the perfect saying. So if anyone has any suggestions...I am completely open.
 The next project moves back into the classroom. It is another of my centers. My District has a list of words for each grade K-3rd, that students should be able to read and spell. These are the words I have included on my word wall. So using the Garden of Words cartridge, I created my 'Word Power' Center. On most days, I think this is one my students put near the top as fun.
 This summer, I hit the jackpot at the Dollar Store. I found high frequency word strips that I cut smaller and laminated. The words have lined up with my District's word lists for the most part. Each week the students work with 5 words. So I add new words depending on the number passed off the previous week.
 I do not provide the students with a list of the words because I want them to rely solely on the wall. I use star shaped Post-It notes to mark the words for the week.
 On Monday the students write the words 4 times each on a form I have developed. (If anyone knows how to download a document to attach to a blog, I would love to attach it.)
Last week when I posted about Curly and the monster fort (click here) and was looking at the pictures of the girls' room, I remembered I had used the Cricut to help stencil the walls. The house we moved into nearly 3 years ago was 2 years old and still had contractor's paint on the majority of the walls. We systematically went through the house and painted.
The girls room was a tough one. Their last room had been pink (Boo's favorite color). So Curly wanted her turn and wanted the room purple. I searched high and low for the better part of 6 months for affordable, cute purple bedding, only to come up empty handed. I can't take credit for the bedding we finally went with, my cute husband found it one day in Target. Though the quilts and shams do not have any purple, the matching sheets do! So it was a compromise Curly was willing to make as long as purple was somehow incorporated on the walls as well. The hubby had a stipulation as well, whatever wall the girls bed was on could NOT be pink. We learned from their last room that little feet and handprints show up well on the pink and washing walls on a weekly basis was not something we wanted to do again.
So with that, and this as my inspiration, I came up with a plan.
To appease the husband, the wall with the bunk beds was painted chocolate. And to appease Curly, a variety of randomly placed polka dots were added for color (and to get the purple in). I cut about 5-6 circles using the George and Basic Shapes cartridge and went to town with my little Benjamin Moore Paint samples and a round sponge brush. The remaining walls were painted pink. But they needed a little something too, to tie it all together. So I added these cute flowers in 3 different colors (one of course being purple). I tried to match the flower from the bedding as close as I could. In order to do so I actually used the asterisk, setting the Cricut on 'shadow' mode, from the All Mixed Up cartridge. Then I cut smaller circles for the flower middles and I hand cut the leaf shape. Again with my little sample paint jars and sponge brushes, I went to town. Though the walls were painted over a 2 day period, the stenciling took much longer. I am a bit of a detail freak and went back over each flower, the centers, and the leaves, and hand painted the stitching with a liner brush. That took another week's worth of time. But it turned out adorable!My mom was kind enough to make this adorable valance using the top sheet from the bedding, some brown fabric, and pink ribbon. It is the perfect finishing piece. Well that and the vinyl saying I am going to one day add to the wall their dresser is on. I'm just waiting for the perfect saying. So if anyone has any suggestions...I am completely open. The next project moves back into the classroom. It is another of my centers. My District has a list of words for each grade K-3rd, that students should be able to read and spell. These are the words I have included on my word wall. So using the Garden of Words cartridge, I created my 'Word Power' Center. On most days, I think this is one my students put near the top as fun. This summer, I hit the jackpot at the Dollar Store. I found high frequency word strips that I cut smaller and laminated. The words have lined up with my District's word lists for the most part. Each week the students work with 5 words. So I add new words depending on the number passed off the previous week. I do not provide the students with a list of the words because I want them to rely solely on the wall. I use star shaped Post-It notes to mark the words for the week.On Monday the students write the words 4 times each on a form I have developed. (If anyone knows how to download a document to attach to a blog, I would love to attach it.)
 Tuesday, they use letter tiles to spell out the words. I cut the letter tiles using the Learning Curve cartridge. But you could use anything from Scrabble tiles to magnetic tiles.
 I pull the letters needed, plus about 10 extras, and then they use the word wall to help them spell out the words.
 I included a picture of the word wall from one week as well as the words spelled out with tiles. When they are done they have to show it to me or my aide and read the words.
 I pull the letters needed, plus about 10 extras, and then they use the word wall to help them spell out the words.
 I included a picture of the word wall from one week as well as the words spelled out with tiles. When they are done they have to show it to me or my aide and read the words.
You will notice in above picture that one of the words does not look like the others (Sesame Street anyone?!) When I don't have the word, I use sentence strips and laminate them. Yes, it bothers me they aren't all the same, but I'm trying really hard to let it go. :)


On Wednesday they do Rainbow words on another form I have developed. For those of you who don't know what Rainbow words are, its easy. The student writes the word 3 times, each time in a different color. They love using their markers, colored pencils, or crayons.
On Thursday, they use Wikki Sticks or Play-doh to spell out the words. This is by far a favorite!
Friday, they have to write each word in a sentence to show they have an understanding of the word, as well as practice sentence writing.
This next center is definitely a student favorite. My listening center is used a little differently than most. I do use it for literature as well, but let's face it, sometimes we have to mix it up a little.
 My students take a turn at the Song Lyric center daily. Think about it, words of a song are catchy and sang at a fast pace. The idea is to increase oral reading fluency.
 My students take a turn at the Song Lyric center daily. Think about it, words of a song are catchy and sang at a fast pace. The idea is to increase oral reading fluency.
So I found songs I thought my students would like from Disney movies/tv shows, other movies like Alvin and the Chipmunks, oldies, Kidz Bop songs, etc. I chose songs I thought kids like and are, or course, appropriate. I spent a great deal of time pulling lyrics from the internet and making sure they matched the version I had.
 I placed them all in this binder in plastic sheet covers. The image on the front of the cover was cut from the Locker Talk cartridge.
 As the student listens to the song, he/she is suppose to use his/her finger to track the lyrics as the song plays. I can always tell the students who are doing it right, because more often than not they are singing along (the correct lyrics), finger in the book, completely oblivious to the rest of the room. It is a crack up! By the end of the week, even if it was an unfamiliar song, everyone is singing it at random times throughout the day.
 Some of my very favorites have been listening to the kids sing The One-Eyed, One-Horned Flying Purple People Eater, The Monster Mash, and Charlie Brown. Hilarious!
P.S. The monster fort is BAAACK! I don't think it's for monsters anymore, more likely a very particular girl clinging to her ritual. I have no idea where she gets that!
Monday, January 17, 2011
Something Old, Something New
I can honestly say I am back in the swing of things since winter break ended and we are back in the the daily grind, counting down the days until ISATs (state testing) are over and Spring Break will begin. January and February are tough months here. It is frigidly cold, which means days on end of indoor recess, cabin fever, and utilizing the creative side to get kids out of their seats and moving, while learning at the same time. I find myself overly tired at the end of every day. It's not so much that I count down the days until Spring Break, but more so counting down until the days get longer and the sun shines.
Over the course of the last few weeks I came to the realization that I am officially OLD! I can't say that I feel much different that I did in my 20s, other than the fatique, so I have secretly held on to the belief that I am still young. I guess I'll have to settle for young at heart. :)
The first instance was over the holidays. We had a few friends over for dinner. The one couple was slightly younger than we are. A conversation began revolving around the healthy appetite of my oldest. Since he began eating table food, he has always been able to consume a great deal of food. He isn't a picky eater (the exception being Kraft Macaroni and Cheese). He will eat just about anything. So he is often affectionately referred to as Mikey. When I made this reference at the dinner party, it was met with blank stares.
So who is Mikey? This is Mikey: He is the young boy who was featured in the Life cereal ads when I was kid. The catch phrase was "Give it to Mikey, he'll eat anything." So the nickname seemed appropriate. After explaining I thought, wow, I am part of a slightly older generation.
The experience that sealed the deal occurred this last week. I was in the car with 'Mikey' who asked to play his iPod through the car speakers. Feeling in a generous mood, I obliged. So I drove down the road as he played song after song filled with words I didn't know. My only choice was to try to find a beat I could appreciate as he repeatedly asked me, "Do you like this song?" All I could think was I'm OLD! Yikes!!
So that is my old, here is the new. Over the last week, my students have been studying for their science tests. I have to teach both 3rd and 4th grade science this year. (In other years I am also responsible for 5th grade, thankfully this year they push into their homeroom class.) I needed to find a way for my students to constantly be studying/reviewing the concepts I have taught. I found the answer when I was thumbing through a copy of the Family Fun magazine. The following idea/article got my creative juices flowing: http://familyfun.go.com/playtime/homework-game-919268/
I already make flashcards for my students to study from at home, but what a fun way to 'trick' my kids into studying in the classroom. And they LOVE LOVE LOVE it!!!
So I got out posterboard, markers, my Cricut, Cricut cartridges, and my laminator and went to town. Yes, I do have a laminator. It is little, only does 8 3/4 inches width, but it comes in handy. I generally order my lamination pouches at Oregon Lamination online, it was the cheapest I could find. But as of late, Sams Club has started carrying them. The price is the same, but no shipping! (Total side note)
 One of my centers is Game. There are a variety of games my students play: POP! (practicing sightwords), Words Their Way (word study games), OOPs!, and others. After they have played, they place this card up on the board.
Disclaimer: The pictures on this posting were all taken with my old camera, so the quality may be lacking. Sorry, but I didn't have the time to retake all of them.
 (I did take the gameboard to be laminated at OfficeMax. It cost around $6, but I know that my hard work will be protected for at least a few years.)
 This is the finished product. I chose to 'decorate' the board with different science concepts across the 3 grade levels. I am hoping that while playing the game, the images will become implanted in their young minds and they will recall the info come test time.
  I included the stages of matter and the parts of a flower.
 The rollercoaster reminds the students of our discussion on speed and velocity.
 Two grade levels need to be able to classify animals and give an example.
Over the course of the last few weeks I came to the realization that I am officially OLD! I can't say that I feel much different that I did in my 20s, other than the fatique, so I have secretly held on to the belief that I am still young. I guess I'll have to settle for young at heart. :)
The first instance was over the holidays. We had a few friends over for dinner. The one couple was slightly younger than we are. A conversation began revolving around the healthy appetite of my oldest. Since he began eating table food, he has always been able to consume a great deal of food. He isn't a picky eater (the exception being Kraft Macaroni and Cheese). He will eat just about anything. So he is often affectionately referred to as Mikey. When I made this reference at the dinner party, it was met with blank stares.
So who is Mikey? This is Mikey:
 He is the young boy who was featured in the Life cereal ads when I was kid. The catch phrase was "Give it to Mikey, he'll eat anything." So the nickname seemed appropriate. After explaining I thought, wow, I am part of a slightly older generation.
The experience that sealed the deal occurred this last week. I was in the car with 'Mikey' who asked to play his iPod through the car speakers. Feeling in a generous mood, I obliged. So I drove down the road as he played song after song filled with words I didn't know. My only choice was to try to find a beat I could appreciate as he repeatedly asked me, "Do you like this song?" All I could think was I'm OLD! Yikes!!
So that is my old, here is the new. Over the last week, my students have been studying for their science tests. I have to teach both 3rd and 4th grade science this year. (In other years I am also responsible for 5th grade, thankfully this year they push into their homeroom class.) I needed to find a way for my students to constantly be studying/reviewing the concepts I have taught. I found the answer when I was thumbing through a copy of the Family Fun magazine. The following idea/article got my creative juices flowing: http://familyfun.go.com/playtime/homework-game-919268/
I already make flashcards for my students to study from at home, but what a fun way to 'trick' my kids into studying in the classroom. And they LOVE LOVE LOVE it!!!
So I got out posterboard, markers, my Cricut, Cricut cartridges, and my laminator and went to town. Yes, I do have a laminator. It is little, only does 8 3/4 inches width, but it comes in handy. I generally order my lamination pouches at Oregon Lamination online, it was the cheapest I could find. But as of late, Sams Club has started carrying them. The price is the same, but no shipping! (Total side note)
 One of my centers is Game. There are a variety of games my students play: POP! (practicing sightwords), Words Their Way (word study games), OOPs!, and others. After they have played, they place this card up on the board.
Disclaimer: The pictures on this posting were all taken with my old camera, so the quality may be lacking. Sorry, but I didn't have the time to retake all of them.
 (I did take the gameboard to be laminated at OfficeMax. It cost around $6, but I know that my hard work will be protected for at least a few years.)
 This is the finished product. I chose to 'decorate' the board with different science concepts across the 3 grade levels. I am hoping that while playing the game, the images will become implanted in their young minds and they will recall the info come test time.
I apologize for the lighting, but took close ups so you can see what exactly is on the board.
 I included the stages of matter and the parts of a flower.
 The rollercoaster reminds the students of our discussion on speed and velocity.
 Two grade levels need to be able to classify animals and give an example.
So I included those visuals
A few simple machines:
 The sun, earth, moon, and a constellation for the space unit
 The seasons for when we study weather
 The water cycle and a skeleton for human development
 My students love playing OOPs! I found some Smurfs (in the Target dollar bins) to use as place markers. They have a great time. To be honest I'm not sure they even realize they are studying. But it is easy to tell who is studying the cards at home! Those are the kids who win the game. The funny thing is it has, in some cases, encouraged others to start studying.
This last week, I ran into the problem of two different grade levels needing to use it at the same time, so I brought in an old Candyland game from home. The students had to answer a question correctly before they drew a card to move forward. So if you don't have a Cricut or the time to make a board like I did, use what you have at home or what you can find at a garage sale, Good Will, etc. The kids really don't care...they just like playing a game!!
Subscribe to:
Posts (Atom)