
In an attempt to share my projects with others, I'm making this a public blog. Updates on the family and other happenings continue to be private. If you'd like an invite please leave a comment with your email address. It will be emailed to me so others won't see it. I'll add you to the private blog. Thanks for stopping by!
Saturday, January 21, 2012

Saturday, January 14, 2012
It's About Time...Right?!
I've only been mentioning it since about July, so here it is. My 2011-2012 school year theme:
 Hey, now you're all All-Star...Not just all-stars at sports, but also all-star readers, writers, mathematicians, historians, and scientists. I tried to incorporate academics with their favorite sports.
Yes, it was partially inspired by the Smash Mouth song, thanks to Shrek. But my motivation was to make something gender neutral that would inspire and appease ALL the boys in my room. I am pleased to say I did just that! It turned out even better than I planned. I sketched it out one day in a meeting, fearful I might not be able to bring to justice my idea. But I actually think I may have out done myself!
Here is my calendar:
 Each month's name is cut in colors that remind you of the season, holiday, or general feel of that month. I used the Varisity Cricut Lite cartridge for the months and lettering of the "Hey, now..."
sign. Each of the different sports balls were cut from the Sports Mania cartridge, using the Designer Calendar cartridge for the numbers. All holiday, birthday, and extra cards were cut from the Designer Calendar cartridge as well.
Here is a close up of the welcome sign that hangs in the 10 foot hallway you pass through to enter my room.

 Most of the details were cut from the Sports Mania cartridge, with a few additional elements coming from the Basketball, Everyday Paperdoll, and All Sports (for the All-Star writing) cartridges.
I also added a star (see the first picture) with each student's picture cut in silhouette (rectangular pics didn't look good) and name. I printed their names in a Varsity font (I found free online) on clear labels and placed under each individual pic. The students love seeing their pics on the wall. They were anxious when we received a new student for his pic to be added to the All-Star wall.
Next up, my birthday wall...
 Hey, now you're all All-Star...Not just all-stars at sports, but also all-star readers, writers, mathematicians, historians, and scientists. I tried to incorporate academics with their favorite sports.
Yes, it was partially inspired by the Smash Mouth song, thanks to Shrek. But my motivation was to make something gender neutral that would inspire and appease ALL the boys in my room. I am pleased to say I did just that!
 It turned out even better than I planned. I sketched it out one day in a meeting, fearful I might not be able to bring to justice my idea. But I actually think I may have out done myself!
Here is my calendar:
 Each month's name is cut in colors that remind you of the season, holiday, or general feel of that month. I used the Varisity Cricut Lite cartridge for the months and lettering of the "Hey, now..."
sign. Each of the different sports balls were cut from the Sports Mania cartridge, using the Designer Calendar cartridge for the numbers. All holiday, birthday, and extra cards were cut from the Designer Calendar cartridge as well.
Here is a close up of the welcome sign that hangs in the 10 foot hallway you pass through to enter my room.

 Most of the details were cut from the Sports Mania cartridge, with a few additional elements coming from the Basketball, Everyday Paperdoll, and All Sports (for the All-Star writing) cartridges.
I also added a star (see the first picture) with each student's picture cut in silhouette (rectangular pics didn't look good) and name. I printed their names in a Varsity font (I found free online) on clear labels and placed under each individual pic. The students love seeing their pics on the wall. They were anxious when we received a new student for his pic to be added to the All-Star wall.
Next up, my birthday wall...
Thursday, January 12, 2012
Winter Craft...
I wanted to do something fun this year for my students to give as a 'holiday' (CHRISTMAS) gift to their parents. My cute mother-in-law gave us a subscription to Family Fun magazine and it has come in handy on more than one occasion...this was no exception. As I thumbed through it I found this.
I started drinking all the Vitamin Water I could stand and collecting my son's Gatorade bottles so the kids could make these adorable snowmen:
 I made these samples with the help of my daughters to show the students what they would be making. I also wanted to see what sort of difficulties little fingers would encounter. My girls had no problem, but students with sensory issues did run into a problem or two.
The basic process is like paper mache, using tissue paper and Elmer's glue mixed with water. Some of them had little trouble at all, others needed some help getting started. A few got bored halfway through and wanted to stop, while others were having a hayday getting dirty and sticky. Then there was my favorite response. One of my little friends took one look at the demonstration and said, "That is disturbing, I'm not touching that." So I came up with a compromise, I smeared the glue and he placed the paper.
All in all, they turned out well. Check out the individuality of each snowman, just like my friends...UNIQUE!


I started drinking all the Vitamin Water I could stand and collecting my son's Gatorade bottles so the kids could make these adorable snowmen:

 I made these samples with the help of my daughters to show the students what they would be making. I also wanted to see what sort of difficulties little fingers would encounter. My girls had no problem, but students with sensory issues did run into a problem or two.
The basic process is like paper mache, using tissue paper and Elmer's glue mixed with water. Some of them had little trouble at all, others needed some help getting started. A few got bored halfway through and wanted to stop, while others were having a hayday getting dirty and sticky. Then there was my favorite response. One of my little friends took one look at the demonstration and said, "That is disturbing, I'm not touching that." So I came up with a compromise, I smeared the glue and he placed the paper.
All in all, they turned out well. Check out the individuality of each snowman, just like my friends...UNIQUE!


Wednesday, January 4, 2012
New Year's Projects...
When we moved into our house over 3 years ago the walls were all contractor white. Slowly, we moved through the house room by room adding color. I have documented the Cricut use previously here, in the girls room. My intent was to add a vinyl quote to their room to complete the look. First I needed just the right quote. The search took some time and I can't even take the credit for the 'perfect' quote. The credit goes to my mom who found a quote that will grow with the happy, beautiful girls who grace our home with love and laughter.
So here's the finished product:
 I used the Doodletype cartridge for the print and Cursive 101 'prettiest.' I think it turned out okay. If was my first vinyl project of this size and took some work, but overall, it turned out well if I do say so myself.
To see my other project...I will be posting it on my private blog (click here). If you are interested, please post a comment and I will send you an invite.
Next on my list of to-dos:
1. Post the super cute classroom craft we made before break
2. Post my theme for the 2011-2012 school year (now that the year if officially half over)
3. Send out invites for the private blog. I apologize to everyone and anyone who has not received one. I didn't send them out due to a little trial life threw my way between Thanksgiving and Christmas' breaks. Nothing to be concerned about, just consumed a great deal of my time. I'm hoping 2012 will be a little less chaotic! :)
So here's the finished product:
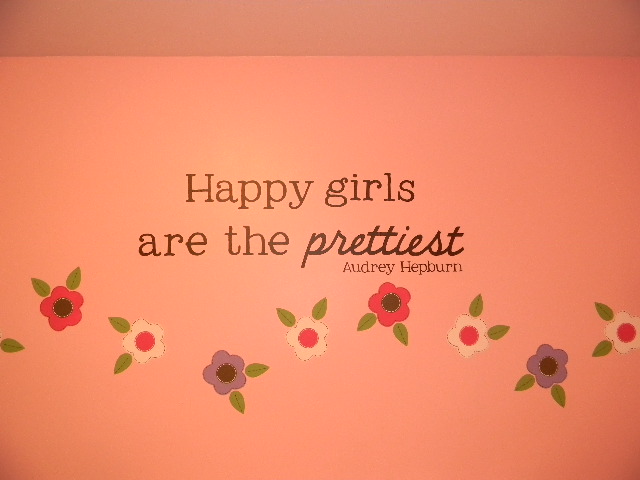 I used the Doodletype cartridge for the print and Cursive 101 'prettiest.' I think it turned out okay. If was my first vinyl project of this size and took some work, but overall, it turned out well if I do say so myself.
To see my other project...I will be posting it on my private blog (click here). If you are interested, please post a comment and I will send you an invite.
Next on my list of to-dos:
1. Post the super cute classroom craft we made before break
2. Post my theme for the 2011-2012 school year (now that the year if officially half over)
3. Send out invites for the private blog. I apologize to everyone and anyone who has not received one. I didn't send them out due to a little trial life threw my way between Thanksgiving and Christmas' breaks. Nothing to be concerned about, just consumed a great deal of my time. I'm hoping 2012 will be a little less chaotic! :)
Sunday, November 27, 2011
Friday, November 25, 2011
Wednesday, July 6, 2011
Menu Cards...
For years I have made out a weekly calendar of meals, noting ingredients to add to my weekly shopping list. I know it has saved me money and trips to the store each week. Over the years, I have used computer generated calendars, but most recently this:
 It's worked for us. My only two complaints would be: 1-the dry erase markers do not fully erase leaving colored smears on the board and 2-coming up with ideas for the meals.
This spring I found something that would take care of both of these issues. But I knew I would need time over the summer to make it happen. So I sat down 2 weeks ago and typed these up. The next day I printed, laminated, cut, and placed magnets on the back of all 46 of them, including two blanks, for meals out and new recipes. Now all I have to do is sort through the cards and place them on the board. Less thinking, easy planning, and cute to boot!
Here they are:


 The great thing is, I can easily make more cards as new favorites come along because they were generated through a PDF file. I was going to provide the link, but as of now, I can't access the site. But in order to give credit where credit is due, I was able to download them from:
www.blog.myheartandhome.com
One of the fabulously talented ladies who contributes to this blog, generated these adorable cards you can type right on. Warning: when you open them, a large white text box appears, the box does NOT print.
I plan to check back to be able to provide the link, otherwise leave a comment with your email address and I would be happy to share!
The one problem I have encountered with these is the flack I take if I don't serve everything indicated on the card. No need to fear I am already 'Cricutting' a disclaimer regarding how all meals are subject to change at the discretion of the cook.
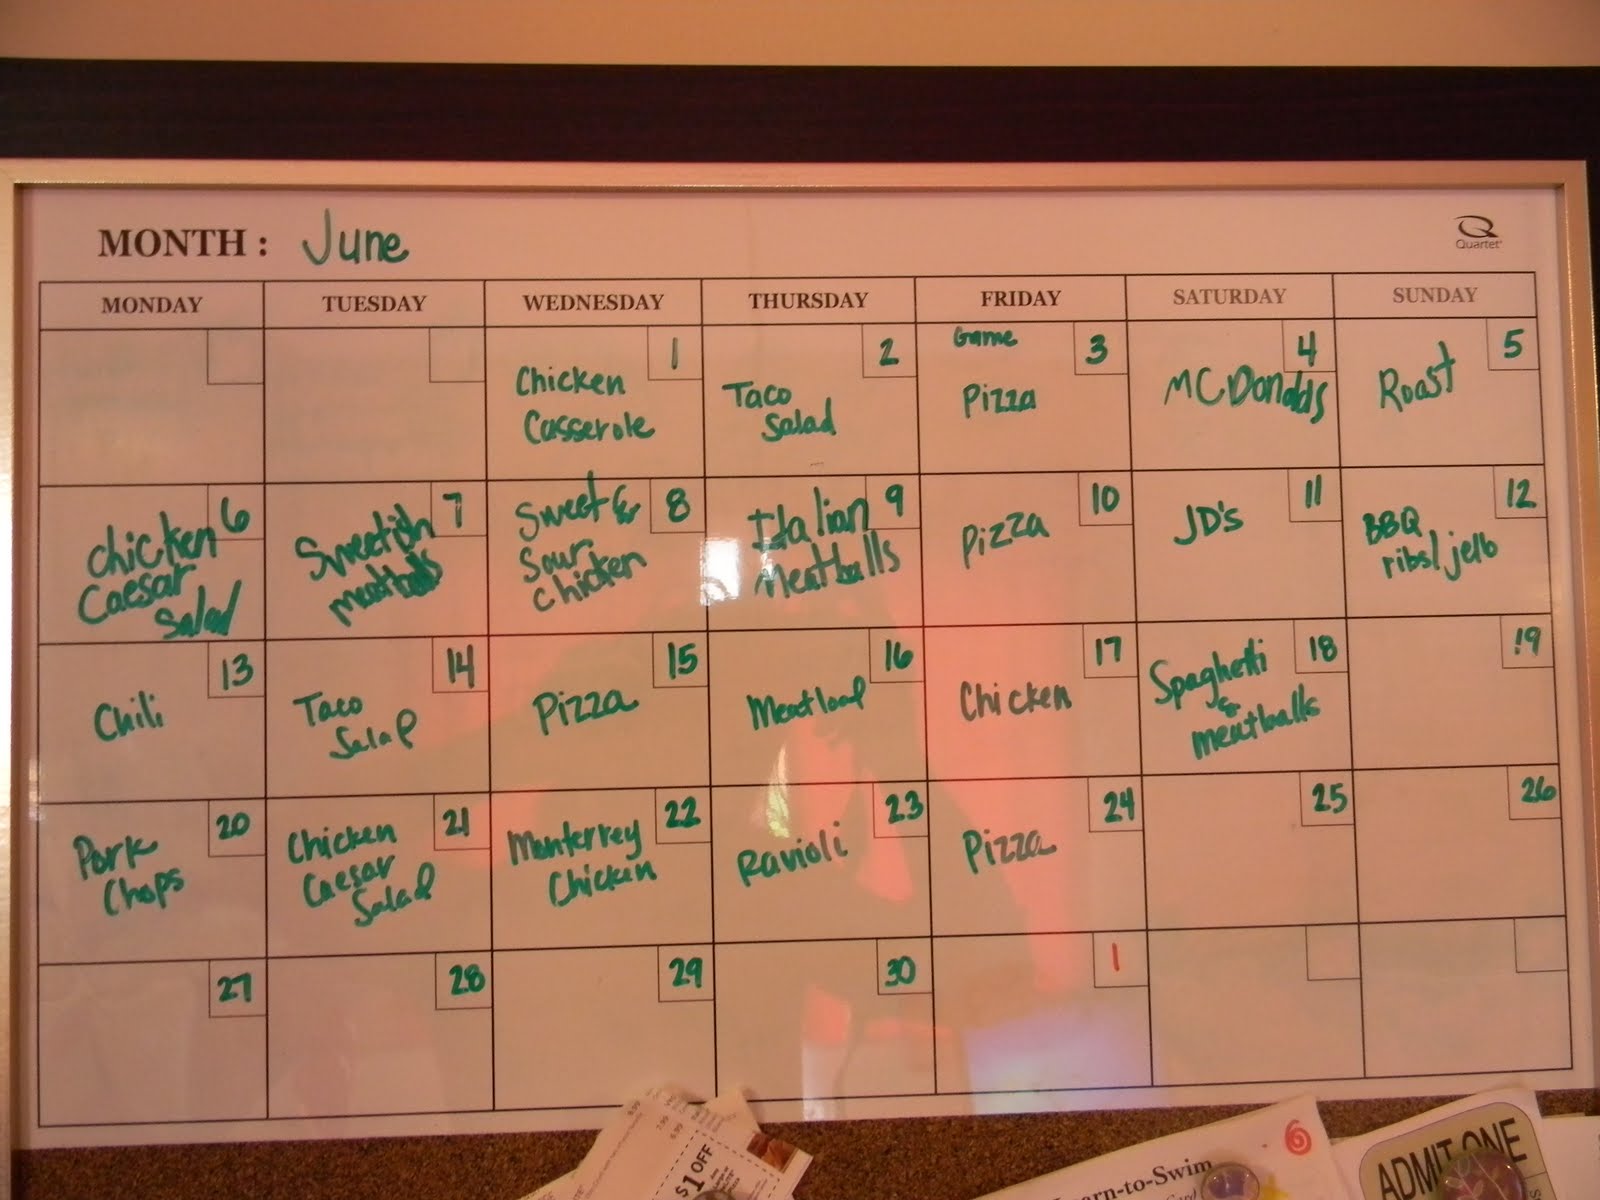 It's worked for us. My only two complaints would be: 1-the dry erase markers do not fully erase leaving colored smears on the board and 2-coming up with ideas for the meals.
This spring I found something that would take care of both of these issues. But I knew I would need time over the summer to make it happen. So I sat down 2 weeks ago and typed these up. The next day I printed, laminated, cut, and placed magnets on the back of all 46 of them, including two blanks, for meals out and new recipes. Now all I have to do is sort through the cards and place them on the board. Less thinking, easy planning, and cute to boot!
Here they are:


 The great thing is, I can easily make more cards as new favorites come along because they were generated through a PDF file. I was going to provide the link, but as of now, I can't access the site. But in order to give credit where credit is due, I was able to download them from:
www.blog.myheartandhome.com
One of the fabulously talented ladies who contributes to this blog, generated these adorable cards you can type right on. Warning: when you open them, a large white text box appears, the box does NOT print.
I plan to check back to be able to provide the link, otherwise leave a comment with your email address and I would be happy to share!
The one problem I have encountered with these is the flack I take if I don't serve everything indicated on the card. No need to fear I am already 'Cricutting' a disclaimer regarding how all meals are subject to change at the discretion of the cook.
Subscribe to:
Posts (Atom)